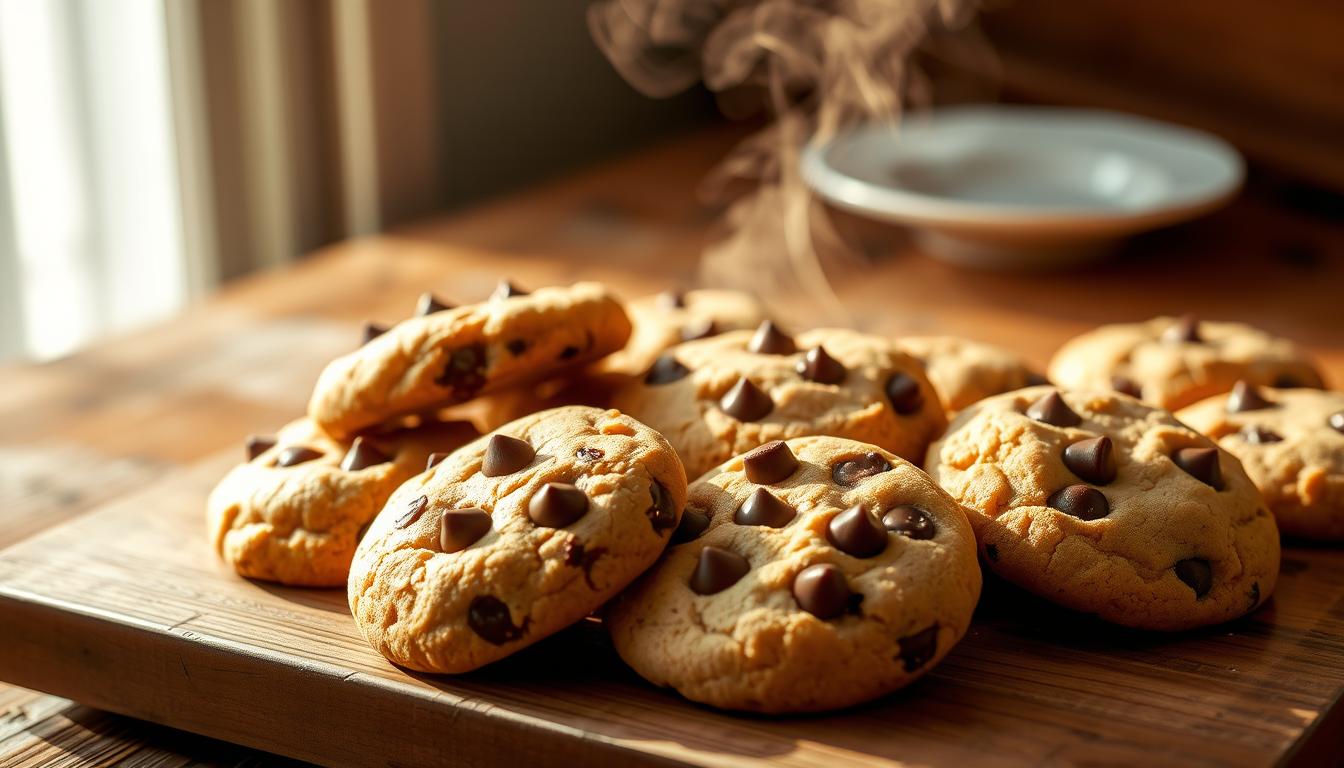
Want to make soft, chewy treats everyone will love? This simple crisco chocolate chip cookies delivers perfect results every time. With just 15 minutes of prep and 13 minutes of baking, you’ll have 3 dozen golden-brown delights ready to share.
Why does this recipe stand out? The secret lies in using Crisco, which creates a tender texture while keeping them fresh longer. Even beginners can master this easy-to-follow guide, praised by families as a go-to favorite.
Grab your mixing bowl and preheat the oven. These crowd-pleasing goodies are just a few steps away!
Key Takeaways
- Crisco ensures soft, long-lasting cookies with ideal texture
- Ready in under 30 minutes from start to finish
- Makes 36 portions – perfect for parties or gifting
- Simple instructions suit all skill levels
- Consistently earns rave reviews as a family favorite
Why Crisco Makes the Best Chocolate Chip Cookies
Not all fats are created equal when it comes to baking. The right choice ensures your treats stay soft, chewy, and fresh longer. Here’s why professional recipes often favor shortening over butter.

The Science Behind Shortening
Shortening has a higher melting point than butter. This means your dough holds its shape longer in the oven, creating thicker, softer results. With 100% fat content, it also prevents excess spreading.
Butter contains 16-18% water, which evaporates during baking. This can lead to thinner, crispier treats. Shortening’s pure fat composition locks in moisture for days.
Butter vs. Shortening: Key Differences
Both fats have pros and cons, but shortening offers unique advantages for consistent results:
| Shortening | Butter | |
|---|---|---|
| Fat Content | 100% | 82-84% |
| Shelf Life | Months (unopened) | Weeks (refrigerated) |
| Texture Result | Softer, chewier | Crisper edges |
Note: Ingredients like Crisco’s Butter Flavor blend offer the best of both worlds—rich taste with shortening’s benefits.
Bakers love shortening for its reliability. As one reviewer raves:
“Great flavors. Easy to follow.”
Developed by B&G Foods, this recipe leverages decades of baking expertise for foolproof results.
Gather Your Ingredients
Great baking starts with quality ingredients. For this recipe, you’ll need a mix of dry staples, wet components, and optional add-ins. Measure everything precisely for the best texture and flavor.
Dry Ingredients: The Foundation
Light brown sugar adds moisture and a subtle caramel note. It works better than dark varieties for a tender crumb. Combine it with all-purpose flour, salt, and baking soda for lift.
Clabber Girl® Baking Soda ensures even leavening. A teaspoon of salt balances sweetness. Here’s how light and dark brown sugars compare:
| Light Brown Sugar | Dark Brown Sugar | |
|---|---|---|
| Moisture Content | Higher | Lower |
| Flavor Profile | Mild caramel | Robust molasses |
Wet Ingredients: Binding and Flavor
Eggs provide structure, while milk adds richness. Vanilla extract enhances depth—opt for Spice Islands® Pure Vanilla Extract for premium taste. These liquids blend seamlessly with shortening for a smooth dough.
Special Additions: Customize Your Batch
Semi-sweet chocolate chips melt into gooey pockets. Pecans add crunch, but you can swap them for extra chips. A pro tip? Try a 2:1 ratio of chocolate to butterscotch chips for a twist.
With these ingredients ready, you’re set to create bakery-worthy treats. Next, we’ll cover the tools you’ll need.
Essential Baking Tools You’ll Need
The right tools make baking effortless and enjoyable. With a few key items, you’ll achieve perfect texture and flavor every time. Let’s break down what works best.
Mixing Equipment for Perfect Dough
Use a large bowl to combine ingredients without spills. An electric mixer creams shortening and sugar smoothly. Heavy-duty stand mixers, like KitchenAid®, handle thick dough effortlessly.
Pro tip: Scrape the bowl’s sides often for even blending. Hand mixers work too, but stand models save time for larger batches.
Baking and Cooling Essentials
Ungreased baking sheets work best with shortening-based dough. They prevent excessive spreading. Insulated sheets promote even browning—no burnt edges!
After baking, transfer treats to a wire rack. This stops sogginess by allowing airflow. For a twist, try a 13×9-inch pan to make cookie bars instead.
“Good tools are half the work. With these, your cookies will shine.”
Step-by-Step Cookie Dough Preparation
Mastering dough preparation is the key to bakery-quality results. Each step ensures the perfect balance of chewiness and flavor. Let’s break it down.
Creaming Shortening and Sugar
Use a mixer with the paddle attachment for best results. Beat 1 cup of shortening with sugars for 2 minutes until light and fluffy. This traps air for a tender texture.
Add eggs one at a time, then milk and vanilla. Scrape the bowl’s sides to avoid uneven mixing. Pro tip: Room-temperature ingredients blend smoother.
Adding Dry Ingredients
Gradually mix in flour to prevent toughness. Overmixing develops gluten, leading to dense dough. Stop when just combined—a few streaks are okay.
- Visual cue: Dough should pull away from the bowl’s sides.
- For gluten-free versions, substitute 1:1 with almond flour.
Folding in Mix-Ins
Gently stir in chips and nuts with a spatula. This preserves their texture and prevents overworking the dough.
Pro tip: Chill dough for 30 minutes if your kitchen is warmer than 75°F. This reduces spreading during baking.
Baking Your Crisco Chocolate Chip Cookies
The oven stage is where magic happens—here’s how to nail it. Perfect texture and flavor depend on precise timing and temperature. Follow these steps for golden, irresistible results every time.
Preheating the Oven for Even Baking
Always preheat your oven to 375°F before baking. This ensures consistent heat from the start. Skipping this step leads to uneven spreading or undercooked centers.
Use an oven thermometer to verify accuracy. Most home ovens run hot or cold. A true 375°F guarantees ideal browning.
Cookie Spacing and Baking Time Tips
Drop dough by rounded tablespoons, spacing them 3 inches apart. This prevents merging during baking. For chewy treats, bake for 8–10 minutes. For crispier edges, extend to 11–13 minutes.
Rotate sheets halfway through for even color. Pro tip: Bake one sheet at a time for optimal airflow.
How to Tell When Your Cookies Are Done
Look for golden edges with slightly soft centers. They’ll firm up while cooling. Leave them on the sheet for 2 minutes before transferring to a rack.
Want bars instead? Press dough into a 13×9-inch pan and bake for 16–18 minutes. Cut once cooled.
“Timing is everything. Pull them out when they’re just set for that perfect chew.”
Variations to Try
Customize your batch with these creative twists for unique flavors. Whether accommodating allergies or just craving something different, these adaptations keep your treats exciting.
Nut-Free Alternatives
For allergies or preference, replace nuts with extra semi-sweet chocolate chips. The official recipe suggests adding ½ cup more when omitting pecans.
Try these delicious swaps:
- Double the chocolate chips for intense richness
- Mix in 2:1 ratio of semi-sweet chocolate chips to butterscotch chips
- Add shredded coconut for tropical flair
Easy Cookie Bars
Short on time? Press dough into a greased 13×9-inch pan. Bake at 375°F for 16-18 minutes until golden. Cool completely before cutting into squares.
Bars offer advantages:
- Single-pan convenience
- Uniform portion sizes
- Great for lunchboxes
“My family prefers bars—they’re easier to pack and share!”
Gluten-Free Adaptation
Swap all-purpose flour with 1:1 gluten-free blend. Add ¼ teaspoon xanthan gum per cup of flour for better texture. Let dough rest 30 minutes before baking.
Successful bakers recommend:
- Bob’s Red Mill® 1-to-1 blend
- Measuring by weight for accuracy
- Slightly longer bake times (add 2 minutes)
For holidays, mix in festive sprinkles or colored sugar. The possibilities are endless when you experiment with ingredients!
Storing and Serving Your Cookies
Keep your homemade treats fresh and delicious with these storage tips. Whether you’re saving leftovers or prepping for future cravings, the right methods lock in flavor and texture.
Keeping Them Fresh for Days
Always let your baked goods cool completely before storing. Transfer them to an airtight container with parchment layers to prevent sticking. At room temperature, they’ll stay soft for up to 5 days.
For longer freshness, add a slice of bread to the container. It absorbs excess moisture, keeping treats chewy. Avoid refrigeration—it dries them out faster.
Freezing Dough or Baked Cookies
Freeze unbaked dough balls on a tray, then transfer to a freezer bag. They’ll keep for 3 months. Bake straight from frozen, adding 1–2 minutes to the time.
Already baked? Layer cooled cookies between wax paper in a sealed container. Reheat frozen ones at 300°F for 5 minutes to revive crisp edges.
“Freezing dough is a game-changer! Fresh-baked treats anytime.”
Serving ideas: Pair warm cookies with cold milk or crumble over ice cream. For parties, stack them high on a cake stand for a sweet centerpiece.
Conclusion
Ready to bake the perfect batch? This ultimate chocolate chip recipe earns rave reviews for a reason. One fan even said, “If I could give this recipe 12 stars, I would!” The method guarantees soft, flavorful results every time.
Don’t hesitate to experiment with the variations you’ve learned. Whether you prefer bars, gluten-free, or nut-free versions, the base recipe adapts effortlessly. With 3 dozen per batch, there’s plenty to share—or stash in the freezer for later.
Pro tip: Double the dough and freeze half for impromptu treats. Now, preheat your oven and taste the difference!

